The National Park Service (NPS), while considering charging overnight camping visitors, isn't sure if that would be feasible. On Sept. 26, 1969, Luis A. Gastellum wrote to NPCS Administrator George B. Hartzog, Jr. with concerns about the proposed fee program. In his letter, he urged the agency to continue to consider the idea. The resulting debate lasted until March 1970, when a congressional directive was issued to implement fees.
Private campgrounds can't be subsidized with tax dollars like federal parks and must charge visitors fees. It is required because it covers expenses incurred by visitors. Many campgrounds agree to charge visitors for the services they provide. For overnight accommodations, expect to pay a higher rate if you're camping in a busy area. While you might be able get a lower rate in certain cases, it is possible to expect to pay more.

Some campgrounds offer free camping for seniors, but they must comply with government regulations. Senior citizens may camp with up to four of their spouses or children. However, there is a charge for a group picnic, backcountry, maritime fees, and day-use fee. In addition, a second vehicle must be parked at the same site and pay half of the fee. Additional vehicles must also have valid park tags. A resident who wants to spend a week at a state park will likely be charged more for the privilege.
A campground is a great alternative to paying more for an RV park. Smaller RV parks offer more amenities and are usually cheaper than larger ones. Although the prices will be lower, you'll still have a place to park your RV. This can be a good option if you are willing to give up certain amenities. This could even help you save money on amenities.
Camping pitches cost for two people, a car and a unit. An awning is free, but some campsites charge a fee. For example, Glimmerglass has sites for six adults and nine children, while site #165 charges a couple of adults and five children. A cabin will cost you more, but it is worth asking the campground in advance about any amenities.
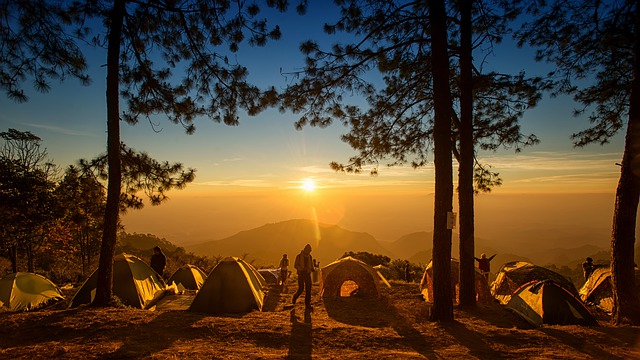
Camping rates will vary depending upon the facility. Camping sites will give each camper a space at a popular campsite. At these sites, the rates are generally fifteen to thirty dollars per night. Sometimes groups will need to be broken up in high seasons. The number of people in the group will determine the cancellation fee. Before you arrive at the park, make sure to read all the regulations.
FAQ
What should you have in a bug-out bag?
A Bug Out Bag (BOB), a kit designed for survival in 72-hour situations without food, water, shelter or communication, is called a Bug Out Kit. It includes a first aid kit, flashlight, whistle, fire starter, compass, knife, matches, rope, bandana, handkerchief, toilet paper, hygiene items, sunscreen, sunglasses, socks, gloves, hat, bottled water, energy bars, batteries, emergency blanket, and other essentials.
Keep in mind that you won't use all of the items in your BOB. Make wise choices.
How long should the supplies in a survival kit last?
You can ensure that you always have enough supplies in an emergency. You don't want be without any supplies when disaster strikes.
For camping trips, for instance, it is important to have everything in one backpack. You will need to have water, food, first aid supplies, fire starters and matches, as well as tools in case of an emergency.
A flashlight, map and compass are all important. These items will help to keep you safe and assist you in finding your way home if lost.
These items should be stored in a waterproof container. When you are hiking, ensure that your supplies are easily accessible and won't be lost.
When packing your supplies, think about what you'll use most often and how much space each item takes up. You can add extra items to save space if you have it. For example, if you plan on spending a lot of time cooking meals outdoors, you could add a stove and pots and pans to your list.
Be sure to remember exactly where your supplies are. If you lose them, you will have very limited options once you reach civilization.
How many days worth of supplies should I have stored away?
Ideal is to have three months of supplies saved away. This means that you should have enough food, water, or other necessities to last three months.
This number can vary depending on how severe the emergency is. If you live in a remote area, you may not have any nearby neighbors who could assist you. Or maybe there's no power grid available.
In such cases, it is a good idea to prepare for a more long-term situation.
What foods do preppers consume?
Preparing for an emergency is a process that requires planning. It also involves stocking up on food supplies, water, medical equipment, and other essentials.
There are many kinds of prepper foods on the market today. Some prefer canned foods, while some prefer freeze-dried food.
You can research online to discover the right type of prepper foods for you. You'll find plenty of information about the best foods to stockpile.
What should I do with my guns?
Yes! Yes. Gun ownership is a protected right under the Second Amendment. But, not everyone can own guns. Guns are not permissible for those with mental illness.
But, having a firearm in your house can save lives. The CDC reports that there have been over 33,000 accidental shooting-related deaths between 1999 & 2016.
The good news? Most states allow concealed weapons to be carried. You still have the option to carry a concealed weapon, even though you're not allowed to possess one.
What emergency supplies should I have at home?
It is important to plan ahead and be prepared for anything if you're going on a long-term trip. You might want to consider packing a few essential items such as food, water, a first aid kit, a torch, batteries, etc. This will help you feel prepared and more confident that you will be able to deal with any situation.
It is a good idea to begin with a basic first aid package. It should contain antiseptic creams as well painkillers, bandages and gauze pads. Tweezers, scissors, thermometers, alcohol swabs and tweezers are also recommended. You may also want to include a flashlight for checking what is in your kit during power outages.
These items can be stored in a container with a lid. This will keep them dry and clean.
Another option is to keep food frozen for up two weeks. You can even make your own freeze-dried foods. These foods are very easy to make and do not require any cooking tools. Simply add hot water and you are ready to go!
A solar-powered battery backup is another option. This will allow you recharge your smartphone, tablet, or laptop.
Statistics
- A survey commissioned by National Geographic found that forty percent of Americans believed that stocking up on supplies or building a bomb shelter was a wiser investment than a 401(k). (newyorker.com)
- In the first ten months of 2016, foreigners bought nearly fourteen hundred square miles of land in New Zealand, more than quadruple what they bought in the same period the previous year, according to the government. (newyorker.com)
- Approximately a hundred and seventeen million people earn, on average, the same income they did in 1980, while the typical income for the top one percent has nearly tripled. (newyorker.com)
External Links
How To
How to keep food alive in a survival situation
Drying food is the best way to preserve it in an emergency situation. Drying food preserves it from moisture, making them last longer. It also reduces the possibility of bacteria growth.
Dried fruits can be used as snacks in emergencies and don't require cooking. They are lightweight and easy to take with you. You don't have to worry about weight gain.
While you can dry fruit at your home using a dehydrator and a sun oven, it's much more convenient to do so in a commercial setting. You could use a solar oven to dry all sorts of foods, including meat, fish, vegetables, and grains.
It is vital to make sure food is sealed tightly when it is being preserved. This will prevent oxygen from getting into the container and spoiling food. If you seal the container tightly enough, there won't be any need to add preservatives.
If you do decide to add preservatives, try adding salt first. Salt prevents mold growth. Then, follow that with vinegar. Vinegar kills harmful bacteria and prevents mold growth.
First, cut the food into small pieces. You can use a kitchen knife or scissors. Make sure you pack everything well so that no air gets inside the container.
Place the food in a plastic bag. Keep the food in the bag until it dries completely.
After the food is dried, seal it in a container. Make sure that nothing touches the food.